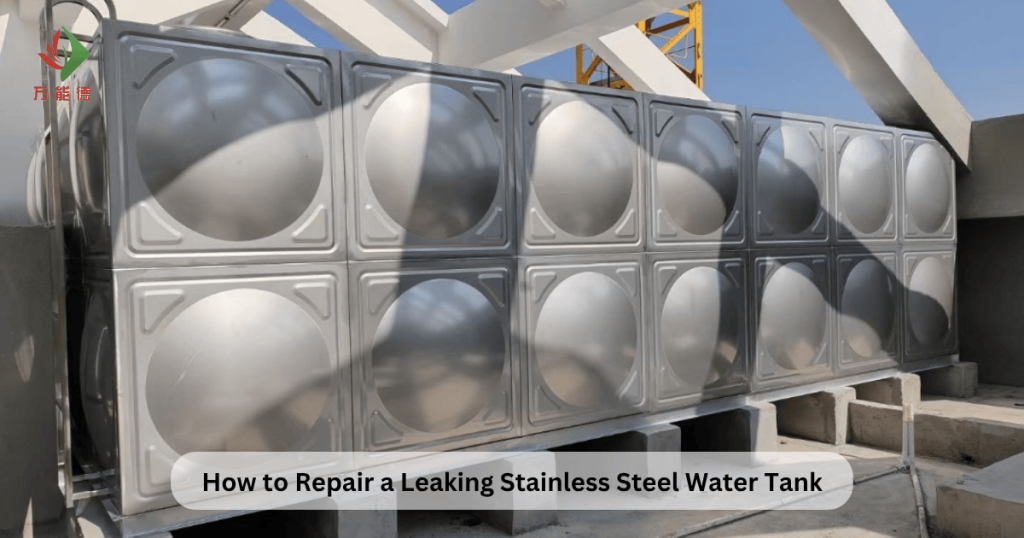
A water tank is a vital component in homes, commercial buildings, and industrial facilities. From storing clean water to supporting firefighting and irrigation systems, it ensures a reliable water supply. However, even the strongest stainless steel or metal water tanks can develop leaks over time due to corrosion, stress, or poor maintenance.
Ignoring a tank leak can cause serious issues — water wastage, structural damage, and costly downtime. That’s why understanding how to repair a leaking stainless steel water tank or conducting a complete water tank refurbishment is crucial.
In this comprehensive guide, we’ll walk you through every step — from identifying leaks to completing a full steel tank repair — so you can restore your tank’s integrity, extend its lifespan, and ensure it performs like new.
Why Water Tank Repair and Refurbishment Matter
A leaking water tank might start as a small issue, but over time, even a minor leak can turn into a serious problem. Water tank repair not only prevents water loss but also strengthens the entire tank structure.
Key Benefits of Early Repair
-
Prevents corrosion from spreading across the tank walls.
-
Reduces the risk of contamination entering the water system.
-
Saves costs on replacing large stainless steel panel tanks.
-
Improves water collection and storage efficiency.
-
Extends the tank’s lifespan through timely water tank refurbishment.
Whether you are fixing a metal water trough, sealing stainless steel tank fittings, or performing a sprinkler tank roof repair, immediate maintenance ensures your tank stays reliable for years.
Common Causes of Water Tank Leaks
Before performing any water tank leakage repair, it’s important to identify what’s causing the leak. Different types of leaks require different approaches to fix effectively.
1. Corrosion and Rust
Corrosion is the leading cause of tank leakage in metal and stainless steel tanks. Moisture, air exposure, and water chemistry gradually erode the metal surface, leading to pinholes or cracks.
2. Worn-Out Seals or Fittings
Loose, broken, or aged stainless steel tank fittings often cause leakage at connection points, valves, or outlets.
3. Structural Fatigue
Over time, water pressure and environmental stress can weaken tank panels or weld joints, leading to small cracks that grow into major leaks.
4. Roof or Panel Damage
In sprinkler tanks and large storage tanks, the roof panels or seams can deteriorate due to constant exposure to moisture, requiring sprinkler tank roof repair or replacement.
Tools and Materials Required for Stainless Steel Tank Repair
Proper steel tank repair demands the right tools and materials. Using the correct compounds ensures durability and leak prevention.
You’ll Need:
-
Safety gloves and protective eyewear
-
Cleaning brushes or shop vacuum cleaner
-
Resin or epoxy repair compound (industrial-grade)
-
Ketone solution or acetone for cleaning surfaces
-
Sandpaper or grinding tool
-
Metal filler or patching stainless steel kit
-
Welding tools (for deep cracks or major corrosion)
-
Replacement stainless steel tank fittings
-
Waterproof or anti-rust coating for finishing
Step 1: Inspect and Locate the Leak
Begin by thoroughly inspecting the tank’s interior and exterior. Look for signs of water leaking from the water tank, such as rust streaks, damp spots, or water pooling beneath the tank.
Inspection Tips:
-
Partially fill the tank with water and check where leaks appear.
-
Mark all leaking areas clearly using waterproof chalk or tape.
-
Use a flashlight to inspect corners, weld seams, and panel joints closely.
Identifying every weak point ensures your water tank leak repair is complete and long-lasting.
Step 2: Drain and Clean the Tank
Once leaks are located, drain the tank completely. This allows you to work safely and effectively on a dry surface.
-
Open the outlet valve and direct water away from the structure.
-
Use a mild cleaning agent or ketone solution to remove dirt, algae, and oil.
-
Dry the entire tank thoroughly using air blowers or a shop vacuum cleaner.
A clean surface ensures proper bonding of the tank leak repair compound and prevents contamination after repair.
Step 3: Prepare the Damaged Area
Surface preparation is a crucial part of every water tank leakage repair. It ensures the sealing compound adheres perfectly.
-
Use a grinder or sandpaper to remove rust, corrosion, and loose paint around the leak area.
-
Wipe the area with a clean cloth dipped in ketone solution to eliminate residue.
-
For weld cracks or deep holes, bevel the edges slightly to create a wider bonding surface.
Make sure all stainless steel tank fittings are inspected at this stage. If you find worn-out gaskets or joints, replace them before sealing.
Step 4: Apply the Repair Compound or Patch
Depending on the size and type of damage, you can either patch stainless steel using resin compounds or weld for more extensive repairs.
A. Resin or Epoxy Repair
For minor leaks or pinholes, a resin compound mixed with ketone solution provides an excellent tank leak fix.
-
Apply the mixture generously over the cleaned leak area using a spatula.
-
Spread it evenly to cover at least 2–3 inches beyond the damaged spot.
-
Let it dry for at least 48–72 hours for maximum adhesion and hardness.
B. Welding for Structural Leaks
If your steel tank repair involves cracks or larger holes:
-
Grind the affected area to expose clean metal.
-
Use TIG or MIG welding to seal the cracks completely.
-
After welding, smooth the surface with a grinder and apply a rust-resistant coating.
These methods ensure a strong, permanent seal that restores your stainless steel tank water system to full capacity.
Step 5: Seal and Reassemble
After the compound or weld repair has fully cured, it’s time to reassemble your tank.
-
Reconnect all pipes, valves, and tank fittings securely.
-
Apply a layer of waterproof coating or industrial paint for extra protection.
-
For sprinkler tanks, ensure the roof is inspected and sealed as part of sprinkler tank roof repair.
Now, fill the tank partially and check all repaired spots for leaks. If no water escapes, your fix tank leak job has been successful.
Step 6: Water Tank Refurbishment for Longevity
Sometimes, tanks require more than just repair — they need full water tank refurbishment to ensure long-term durability.
Refurbishment Includes:
-
Replacing damaged or corroded panels in stainless steel panel tanks.
-
Cleaning and recoating internal surfaces with anti-rust paint.
-
Inspecting and replacing all stainless steel tank fittings.
-
Repairing or replacing sprinkler tank roofs and support structures.
-
Conducting leak tests after every stage of refurbishment.
Refurbishment transforms an aging tank into a like-new system, providing years of reliable service and minimizing future tank leakage risks.
Step 7: Test and Monitor
After repairs and refurbishment, conduct a full water tank leak test:
-
Fill the tank gradually while monitoring for leaks.
-
Check pressure points and welded areas after 12–24 hours.
-
If no seepage occurs, the water tank leak fix is complete.
Regular inspections afterward will help catch small issues before they grow into major leaks.
Preventing Future Leaks in Stainless Steel Tanks
Maintenance is key to preventing future tank leak repair needs. Even the best stainless steel tank can fail without care.
Pro Maintenance Tips:
-
Conduct visual inspections every 3–6 months.
-
Clean the tank regularly to prevent sediment buildup.
-
Reapply protective coatings every 2–3 years.
-
Tighten and inspect all tank fittings and joints routinely.
-
Schedule professional water tank refurbishment every 5–7 years for industrial systems.
By maintaining your tank properly, you reduce the risk of water tank leakage and ensure uninterrupted water supply.
When to Call a Professional for Tank Leak Repair
DIY repairs are suitable for small leaks or surface rust. However, call a professional when:
-
The leak originates from a welded seam or base joint.
-
Corrosion has spread across multiple panels.
-
The tank structure shows deformation or bulging.
-
Repairs fail repeatedly or leaks reappear.
Professional water tanks repair services use advanced welding, sealing, and testing methods — ensuring your storage tank repair lasts for years.
Final Thoughts
A leaking stainless steel water tank doesn’t have to mean replacement. With proper tools, quality compounds, and careful attention to detail, you can efficiently repair water tanks, stop tank leakage, and restore functionality without downtime.
From sprinkler tank roof repair to patching stainless steel and complete water tank refurbishment, following the right steps guarantees reliable performance and water safety.
Regular inspection, professional maintenance, and the right water tank leakage solution will help you fix problems early — saving time, water, and money.